Sunday, June 19, 2011

A Gift Years in the Making

My parents arrived this past Wednesday toting a mystery duffle bag containing a present they told me that they had, but needed to give to me in person. I had no idea what they could be talking about when they first told me about it, and even less when presented with a large soft duffel bag. Inside was something we'd been talking about for so long that I despaired that it would ever get done, and also something that will require some explanation for those of you who haven't known me too long: a t-shirt quilt made from Hard Rock Cafe t-shirts.

I've been collecting Hard Rock Cafe t-shirts since I was a teenager. I'm not sure what city my first one was from, but I've been marking my travels by purchasing the "city shirt" in any city where there's a restaurant. You can't get this shirt on the Internet and it always blends rock 'n roll motifs with landmarks or famous aspects of the city. I particularly love my Madrid shirt with a rock interpretation of Picasso's Guernica painting (see it here) and the Barcelona shirt with "tiled" images inspired by architect Antoni Gaudi's buildings in the city (particularly the Parc Güell). Another cool one was the 25th anniversary shirt marking 25 years in business, which I got at the original restaurant in London. Is HRC the best restaurant? No. It's food is roughly like TGI Friday's. But the shirts are a unique souvenir, and sometimes when you've been abroad for while, the HRC provides exactly the island of American-ness you crave. (Not to mention a hamburger done right, which does not involve frying in olive oil - I'm looking at you, Italy)

My good friends Veronica and Ellie both have one or more t-shirt quilts made from shirts they wore in high school or college that remind them of fun memories, but don't really need to be worn anymore. You take the shirts, cut a square out of the front or back and then put them in a big grid with fabric in between and on the back. It's a simple concept that nevertheless demands some time, attention, and sewing skills, of which my mom has the most of the latter and less of the two former.

Just when I thought I might outsource it to Veronica's mom, Dad's longtime coworker, Lorra Ewy (pronounced A-vee) mentioned that she needed a new sewing project, so Dad brought up our quilt idea. Laura did the planning, sewing, and layout and also chose the fabric based generally on my love of teal. Mom and Dad dug the box of t-shirts out of the basement and threw in a few of their own to round out a queen-sized quilt. Lorra passed it on to Wanda Hiebert of The Happy Stitcher to do the quilting, and I think the result is pretty great. Behold:

This thing is big! You're not even seeing it all because my arms just aren't that long. Here are some close-ups of a couple of elements:

The classic shirt from the 1st London restaurant.

The front pocket from the Barcelona shirt- pocket logos made it on there too.

The awesome wave-inspired quilting is easier to see on the back, which is a lovely soft flannel-esque material. 

I love the way it came out and I'm happy to see all my shirts again! Thanks, Mom, Dad, Lorra and Wanda!!

Friday, June 10, 2011

Foodie Friday

I thought it was time to dish out another recipe. The reno's moving along, but nothing sexy enough to blog about at the moment. I want to share my first "original" recipe, which also won first prize among a field of 16 in last year's dessert competition at work. I posted it on AllRecipes.com and submitted it to be "kitchen tested," but haven't heard back yet. I'm sure they get a few submissions ;) I mostly cobbled together a graham cracker crust recipe, changed a green tea cheesecake recipe, and added the chocolate creme layer to make one fairly stellar dessert. A friend's 7-year-old said it was "better than La Madeline," which made me happy. Sadly, I've failed to take a photo each time I've made it, so I can't wow you with a visual on this one.


Ingredients


  • 2 Cups crushed Oreo cookies (less than 1 package) 
  • 4 Tablespoons unsalted butter, melted
  • Cheesecake:
  • 3 8oz. packages of regular cream cheese, softened (aka leave on counter for a while) 
  • 1 cup white sugar
  • 1 Tablespoon vanilla extract (the best you can find) 
  • 3 large eggs
  • 5 oz. heavy whipping cream
  • Chocolate Creme:
  • 1 package milk or semi-sweet chocolate chips (OR 12 oz chopped chocolate)
  • 2 eggs
  • 1 1/2 cups heavy whipping cream

This is not a low-fat recipe. You might be able to do some reduced-fat cream cheese and half & half instead of heavy cream, but it's probably best just to eat less at a time ;) Egg beaters are a win though. 

Directions

  1. Preheat oben to 350 (325 for convection)
  2. Set out your cream cheese to soften.
  3. To Make Crust:
  4. Pulse Oreo cookies in a food processor or place in plastic baggie and crust with rolling pin until you have 2 cups. Melt the butter. Combine oreos and butter in a medium bowl and stir until crumbs are uniformly wet looking. Press crumbs into a 9x13" pyrex or metal pan (or 9x11" for thicker bars) in an even layer. Bake for 10 minutes at 350F.
  5. Cheesecake Filling:
  6. While crust is baking, begin making filling. Using an electric mixer or stand mixer, cream together cream cheese and sugar until smooth. Add vanilla, then eggs one at a time and continue mixing. Stir in whipping cream and mix until incorporated. Pour or spoon mixture onto baked crust. Bake for 40-45 minutes. The filling should still jiggle slightly when shaken and be just beginning to brown on top when it's done. 
  7. Chocolate Layer:
  8. When cheesecake layer is nearly done cooking (maybe 5-10 minutes left) begin making chocolate filling. Place chocolate chips and egg in a blender. Heat cream in a microwave-safe measuring cup until just boiling (1-2 minutes). Add hot cream to egg and chocolate in blender (this kills the salmonella etc in the eggs). Place lid on blender and and mix/puree until smooth. Use a spatula to scrape sides of blender and blend once more until smooth. Pour chocolate layer onto cheesecake once it's done baking. Allow to cool for a while on the stovetop or other heat-safe surface and then refrigerate for 2 hours or overnight. Slice and serve.

So the 3 separate stages can be a bit of a pain, but no stage of this dish is particularly difficult. It works well for events where you have to bring a dish (best make it the night before), and has been a crowd pleaser wherever I take it. 

Enjoy!

Monday, May 30, 2011

A San Francisco Treat

At the very end of last week, I found out that I would be traveling this week to San Francisco for some meetings. I decided to stay an extra day to explore the city since I hadn't yet visited this part of California. my parents and I had a lovely time in Monterrey, but never got as far north as the bay area last time. And, as my mother reminded me, the last time I was there I was a queasy feeling and an aversion to fish that she just couldn't explain. (before realizing later that she was pregnant with me) So one hurried booking of plane tickets, two long plane rides and a couple of meetings later, I was ready to tour. Coworkers had assured me that I could "see it all in one day!" but I was skeptical. I've since learned that you can clap eyes on all the sites in one day, but you can't "do" it all in a day, as my still-aching feet will attest. I didn't book my ferry to Alcatraz early enough and refused to be ripped off by the secondary tour groups, so I'll have to save it for next time. I did succumb to the "hop-on. hop off" double-decker open top bus, so here is a pictorial record of my journey around town:

I started off my day with a trolley ride down to the Ghirardelli square area. It's a pretty beach front area with shops, restaurants, and the all-important chocolate gift shop and ice cream parlor, but frankly there's not a lot of "there" there. I was hoping to get a tour of an old chocolate factory or some sort of historical something, there was really just a nice plaque and boutiques. I did learn (from the plaque) that Ghirardelli was apprenticed as a sweet maker in Italy, but moved to Uruguay, Lima, and finally to California in the gold rush. He started as a grocery supplier, but both the store locations he had built burned down in an earthquake and he turned back to confection making, luckily for us. 

A cheeky seagull and an historical ship.

The Golden Gate started the day shrouded in mist

This may be my favorite picture of the trip. This was a candid I took of 2 "statues" on break in the Fisherman's Wharf 711 getting their change turned into cash and snacks. I think this was their usual money changing spot and they seemed to know the staff there. So funny. 


The Transamerica building from afar and from straight down. 


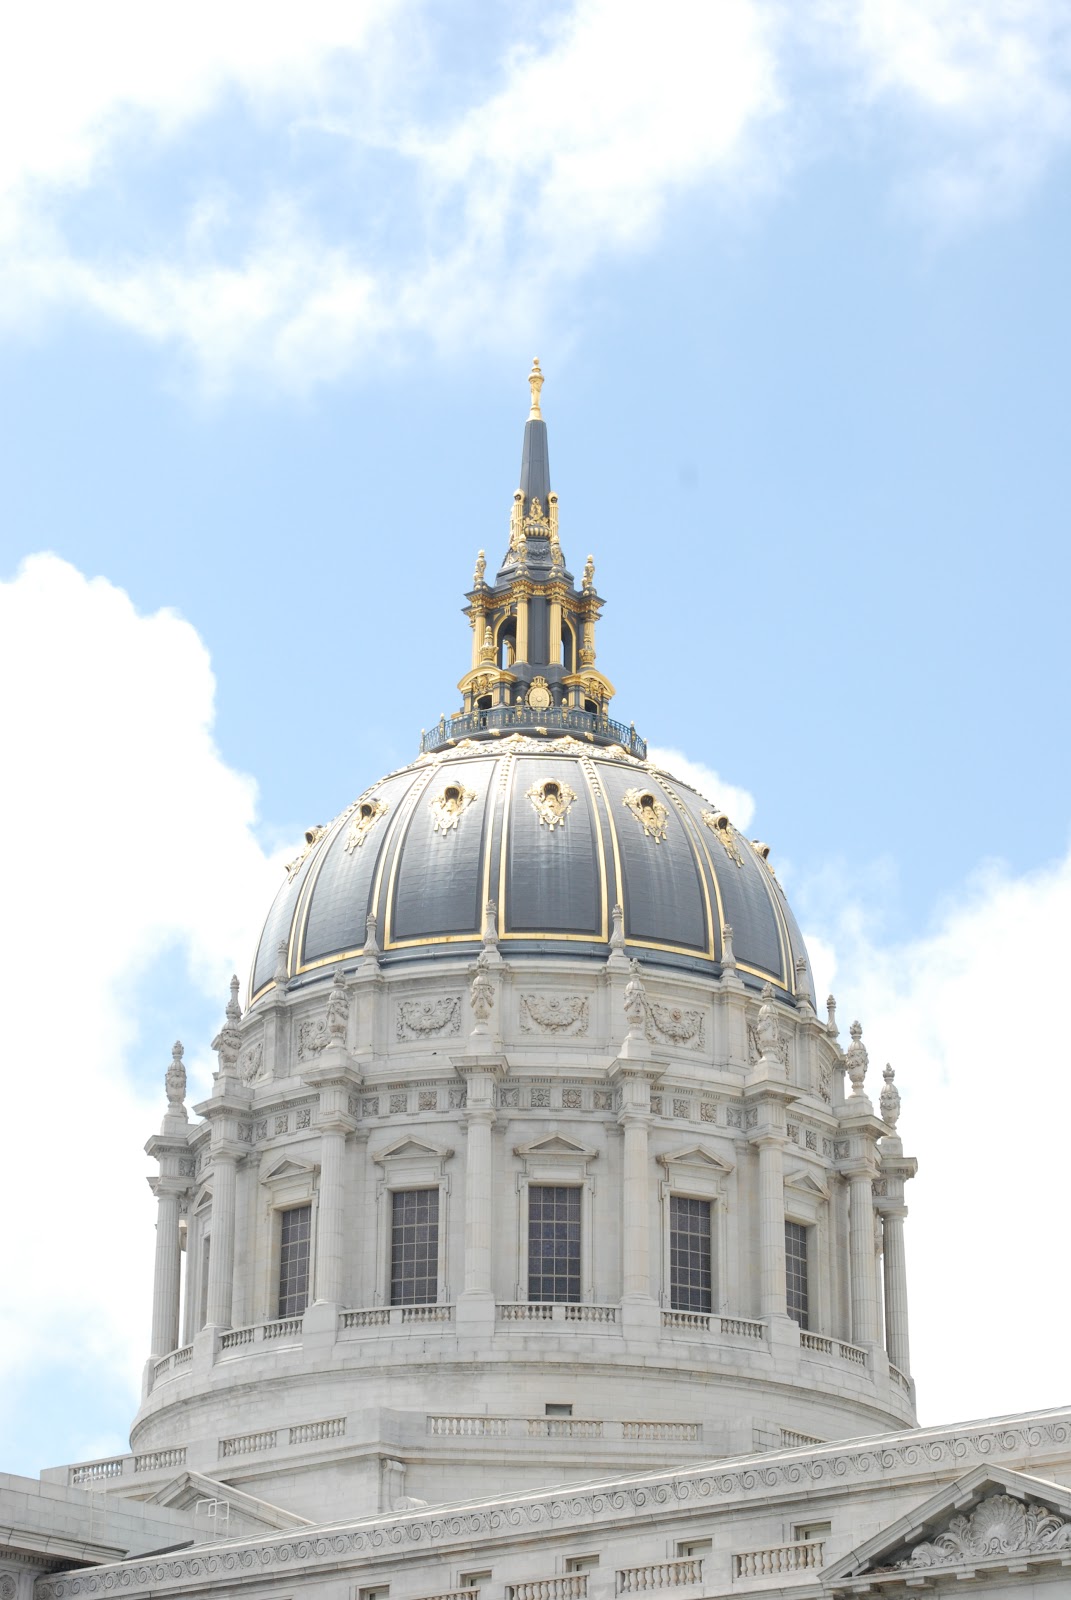
Some shots of the fancy SF City Hall. It's taller than the US Capitol building...upstarts.

Next up, some of the historic houses known as the 6 sisters or the "painted ladies."


Lovely, aren't they? I think it would be a lot of pressure owning one though, what with all the nosy tourists taking pictures all the time.


Another opportune seagull on a fountain in the garden between the California Academy of Sciences and the De Young museum.

And, at last, the Golden Gate Bridge with a little more sunshine late in the day.


I got a little fancy with a couple of double exposures next.


One more with the flag and the tourists...

The Palace of Fine Arts Pavilion was originally built for an international exposition in 1915, right after the city recovered from the big 1906 earthquake. It was originally built only to last a year as an exhibition space for...you guessed it, fine arts. The local residents petitioned to keep it, later it fell into disrepair, and it was permanently restored in the 1960s in materials built to last based on (and molded from) the original. This structure is hugely tall and really breathtaking in a warm sandstone color.


Look at those figures on the top- just crazy big!

While I was there a group of friends was gathering (then hiding) as a girlfriend was about to be proposed to. Nice setting, guy- well played!

Okay, in case you aren't asleep yet, here are a few bonus flowers...because you know I just can't help myself, I'm a macro flower junkie. Not in recovery. Not even trying to get well.


Thanks for coming on my tour of San Francisco!

Sunday, May 22, 2011

Bathroom Reno, Part Deux

I've been continuing to work on the floor in the ragged corners of my time, but I think I've reached the midpoint of the project. Since I last wrote, I put down and then ripped up the mosaic tile border I had planned. *Sigh* I failed to think in 3 dimensions when I planned the floor and the mosaic tiles aren't as thick as the marble ones, which would have left a nice ledge around the outside to trip over at night. So I scraped it all up while silently cursing myself and resolved to use the marble over the whole floor. Here's the border that almost was: 
Oh well. I kept most of the mosaic tiles, so maybe I can reuse them in a table or a piece of art or something. 

The good news is that I finished cutting tiles today and have now laid, mortared, and leveled all the pieces. Whew. 


It may look a little blue in the photo, but it's "Grecian white" marble. Now I have to let the last pieces cure for at least 24 hours before I grout the floor. After that I can start putting things back in the bathroom and finally get the new toilet and vanity installed. It'll be nice to have the boxes and toilet out of our dining room, but the cats are really going to miss the vanity box! They like being up high on it, and it's their favorite new nap spot.


Based on my experience doing this project, I have a few nuggets of advice for anyone thinking of doing their own tile project.

  • Invest in a tile saw. If you're super coordinated and can have everything ready ahead of time, maybe you could rent one and save some money, but I got one at a Black Friday sale and will use it for several projects.
  • Wear eye protection when you cut tile. In this case, eye pro is not just for suckers and mama's boys. Stuff will fly off the saw no matter how careful you are, and even if you used the snap kind of cutter it's a good idea to cover your eyes. 
  • You can make curved hole with a straight saw- it just takes some time and requires some ingenuity 
  • Leveling is important and annoying. Make sure you have a 3 or 4 foot level and a little one for tight corners and small pieces. 
  • Cut your tile with the "good" side down. The marble I used usually chipped a bit at the end of the cut. Cutting with the rough side up ensures that you don't ruin your piece of tile with a chip on the side that shows. 
That's the news for now! Next time I blog hopefully it'll be the beauty shots of the finished room!

Monday, May 16, 2011

Chef Sarah's Choice: Empanadas

Clearly I've been a little remiss in my blogging lately, so I'm going to make it up to you with food. I intend to post recipes from time to time that I've been enjoying and adapting so that you can do the same if you like. My title here is a nod to our middle school cafeteria, which used to offer "Chef Sarah's Choice" entrees that were usually either something easy or something to use up leftovers from earlier in the week. Let's hope my recipes are a little more enjoyable than hers were :)


First up is Venezuelan Empanadas. This recipe came originally from the Food Network. I made it faithfully the first time and then of course abandoned half of it and did my own thing. Here are the ingredients as listed, with my notations in green:

Ingredients

For the Fillings:

  • 1 1/2 pounds beef blade roast, cut into 4 pieces, trimmed (any kind of beef roast works)
  • 4 bay leaves (I've skipped these with no detriment to the dish)
  • Kosher salt
  • 2 tablespoons extra-virgin olive oil
  • 1/2 medium onion, diced
  • 1/4 green bell pepper, diced
  • 2 cloves garlic, minced
  • 1 shallot, diced
  • 1 scallion, chopped (I sometimes just add more shallot if I don't want to buy a whole other onion item)
  • 2 teaspoons paprika (I go about half on the paprika because I'm not a huge fan)
  • 2 teaspoons sazon completa (seasoning blend found in the spice aisle- use Sazon Goya)
  • 1/4 teaspoon dried oregano
  • 1/4 teaspoon ground cumin
  • Freshly ground pepper
  • 1/3 cup (ish) of beef stock

For the Dough:

  • 3 tablespoons sugar
  • 1 1/2 tablespoons vegetable oil, plus more for greasing and frying
  • 1 1/2 tablespoons unsalted butter
  • 1 tablespoon salt
  • 3 1/2 cups precooked cornmeal (such as P.A.N. brand)
  • 1/4 cup plus 2 tablespoons all-purpose flour

For the Sauce:

  • 1 1/4 cups cilantro (leaves and stems)
  • 1/2 cup extra-virgin olive oil
  • 1 medium avocado, halved, seeded and peeled
  • 1/4 green bell pepper, chopped
  • 1 scallion, chopped
  • 4 teaspoons white vinegar
  • 1 clove garlic, crushed
  • Kosher salt and freshly ground pepper

  • Make the sauce: Combine the cilantro, olive oil, avocado, bell pepper, scallion, vinegar and garlic in ablender. Add 1 teaspoon salt and 2 teaspoons pepper and puree until smooth. Thin out the sauce with up to 1/4 cup water and serve with the empanadas.
I make this dish in the crock pot and it's very easy and smells amazing when you come home. I throw all the ingredients from the filling portion, plus a little beef stock, into the crock pot on Low for 6 or 8 hours. I usually chop up all my onions etc and measure my spices the night before. I store them in a tupperware container in the fridge so I can just dump it all in the crock pot and add the beef (with a little salt and pepper) and go to work. Now this is where you choose your own adventure. I am both lazy and frightened of the frying process, so I frequently make the filling and put it in regular taco shells with a little white mexican cheese or monterey jack and either this sauce or green salsa. (okay fine, I don't use the sauce, but George likes it a lot). I'm including the recipe link so you can follow the real empanada instructions if you wish. You could probably also make the dough, fill it, and bake the empanadas instead for a lower fat, lower risk version. I haven't tried it yet, but I should because the dough turned out well. So depending upon your level of motivation, this disk gives you lots of options. 

Que te aproveche!

Sunday, May 8, 2011

Spring Snap of the Day

The clematis flowers that I planted on the balcony of our old
apartment are looking great again this year.

Painted bathroom

On Friday the bathroom was lavender-grey. Today it's a blue-grey and
I've got the new light fixture up. :)